

Render 3D objects in UMG Widget/HUD
https://engineunreal.wordpress.com/2015/04/21/render-3d-objects-in-umg-widget-hud/
As you may be aware of, it is not possible to directly render 3D objects/blueprints/meshes in a UMG widget (as of UE 4.7.4 at the time of writing).
I shall try to clearly explain how I achieved it. Here is what we are trying to get as a result: [gif coming soon]
The basic principle is to capture your 3D object to a 2D ‘image’ that you will be able to use in your UMG widget.
Basic explanation is good, but having more details is even better! So here are the steps:
- Create a scene capture blueprint
- Capture to a 2D texture
- Create a material from that texture
- Use that material in your widget
 I you feel more like reverse engineering without reading what I have to say, I also made the code available on GitHub :p
Prerequisites / Project setup
What you need to be able to follow this is a UE4 project with a UMG widget that displays somewhere in your game (basically in your HUD for instance).
If you don’t have such a UE project, you can follow this simple tutorial and come back here right after having completed it.
But if your very own project seems to fit to that description, you can skip directly to the scene capture creation.
Now that we are on common grounds, we are good to go!
1 – Create a scene capture blueprint
Begin by creating a… yep, a Blueprint, how surprising! Choose ‘Actor’ as its parent class. I named it ‘CaptureBlueprint’. 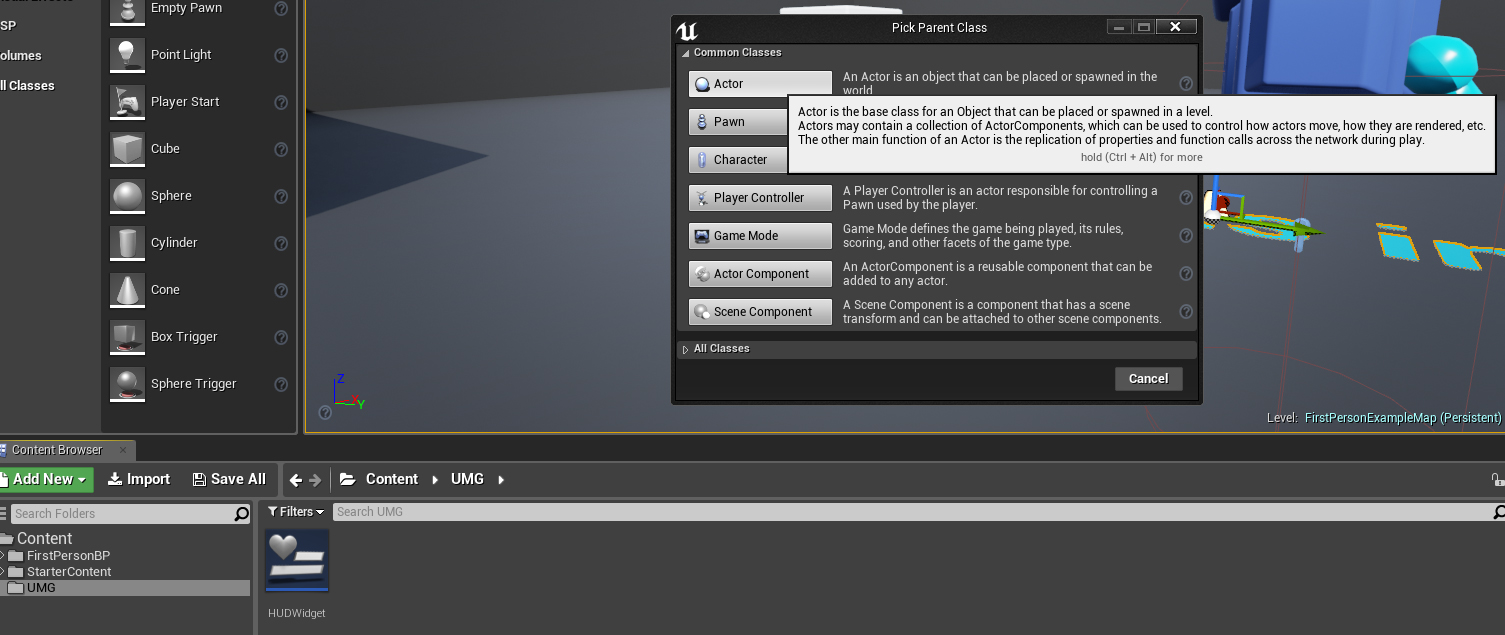
Open it. We will start by creating a closed ‘room’. For that, add 6 StaticMesh components ‘Floor_400x400’ (that mesh is provided by default in the engine). Make sure that the root component of the BP is the actual floor of the ‘room’. “Why the heck would I need to build a box?!”, that’s probably what you’re thinking right now. I know that this comes ‘out of the blue’, but trust me, it will make sense! Here is what it looks like without the roof: 
Now that we have our ‘studio’ (I think that’s a cool descriptive name actually, I’m going to call it ‘studio’ until the end), we need to change its walls color. We are willing to create a ‘bluescreen’, yes, exactly like the ones they use when shooting movies!
For that purpose, we will create a Material that we will be able to apply on those walls. I named it ‘StudioMaterial’. Edit it. Add a Constant4Vector component from the Palette and change its color to a color your 3D model won’t contain (again, this is a bluescreen). I chose a bright cyan color RGBA(0, 1, 1, 0). 
Set this color as the Emissive Color of the Material. Finally, set the Shading Model of the Material to Unlit. This is really important, as with that option, our studio walls won’t be affected by the 3D object shadows and the lights, and will therefore appear with just one united color (the one we’ve just chosen, actually). 
Now back to our studio, set the walls material to the one we just created. You can now add the 3D Object/Mesh you want to render in the UMG widget to the studio! I did not have the time to find a funny model to render, so I just chose a default Mesh (SM_MatPreviewMesh_02). Make sure it is in the studio room (at least for the part you want to see). You can of course make the studio bigger if needed.  Then add a Camera to the Blueprint. Try to put it in front of the Object to render, so that the camera can actually film it.
Finally, add a SceneCaptureComponent2D to the Camera. That is the component we are going to use to render what the camera films to a 2D Texture. 
As a final step for our studio, we add some light to the Blueprint. I insert the Light component in front of my object and I let the light options to their default value. You can of course add more than one, tweek their options, and place them wherever you like. If you don’t add light(s), then your capture will look very dark (but it could be the effect you want, I don’t know!). 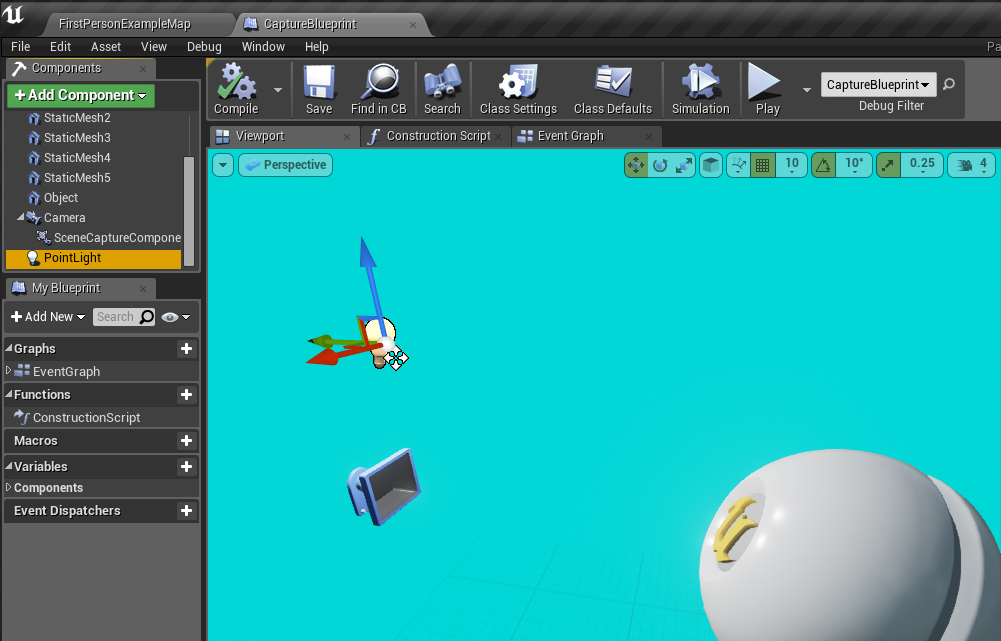
You can now relax, we are done with the tricky part of this. Compared to what we have already achieved here, what’s left will seem as easy as my first girlfr… NO, I cancel this sentence.
2 – Capture to a 2D texture
Now we need to tell our SceneCaptureComponent to what it should save what it captures. For that purpose, we first have to create a new TextureRenderTarget2D in our project. I named it ‘TextureRenderTarget’. 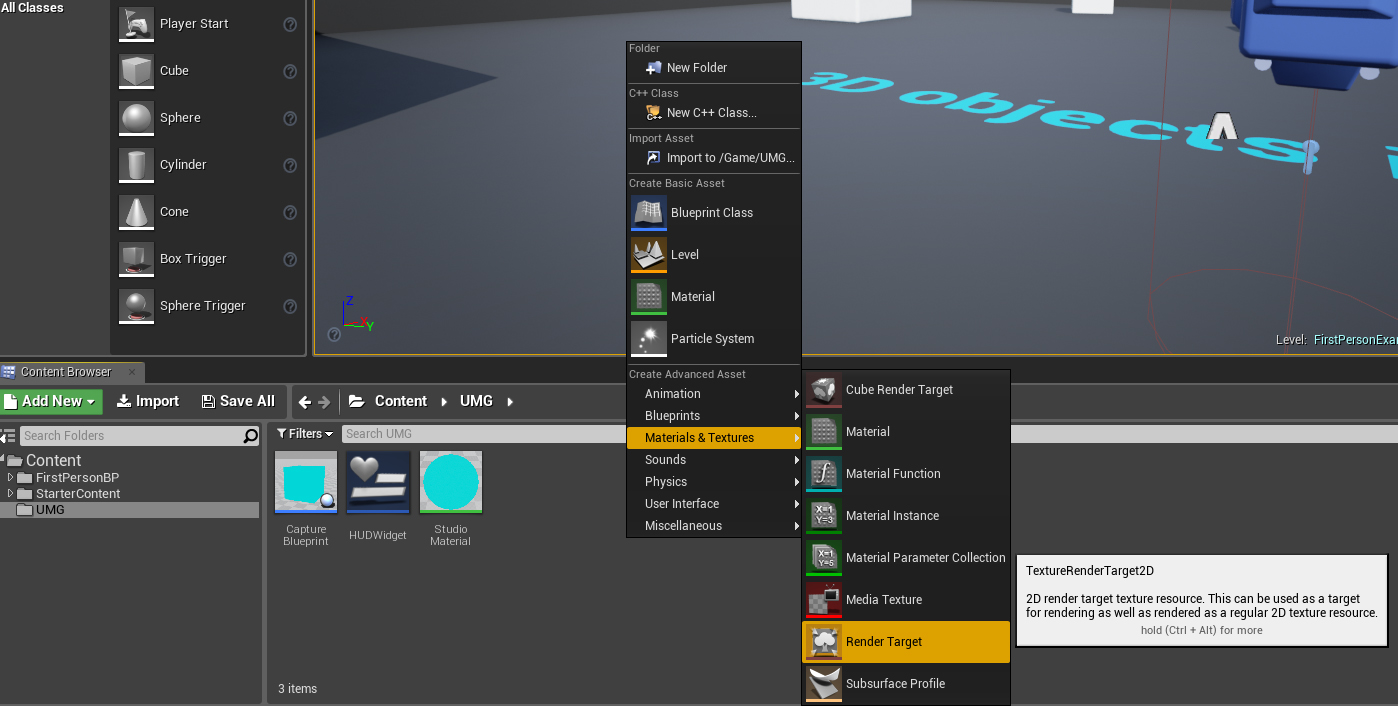
Edit it and set the ‘Size X’ and ‘Size Y’ to one that fits your needs. Note that the default is 256×256, and that those sizes will impact the quality of the rendering in UMG. Here I chose the maximum size, which is 2048×2048. 
Now back to our ‘CaptureBlueprint’, just set this brand new element as the Texture Target of the Scene Capture Component, then save. 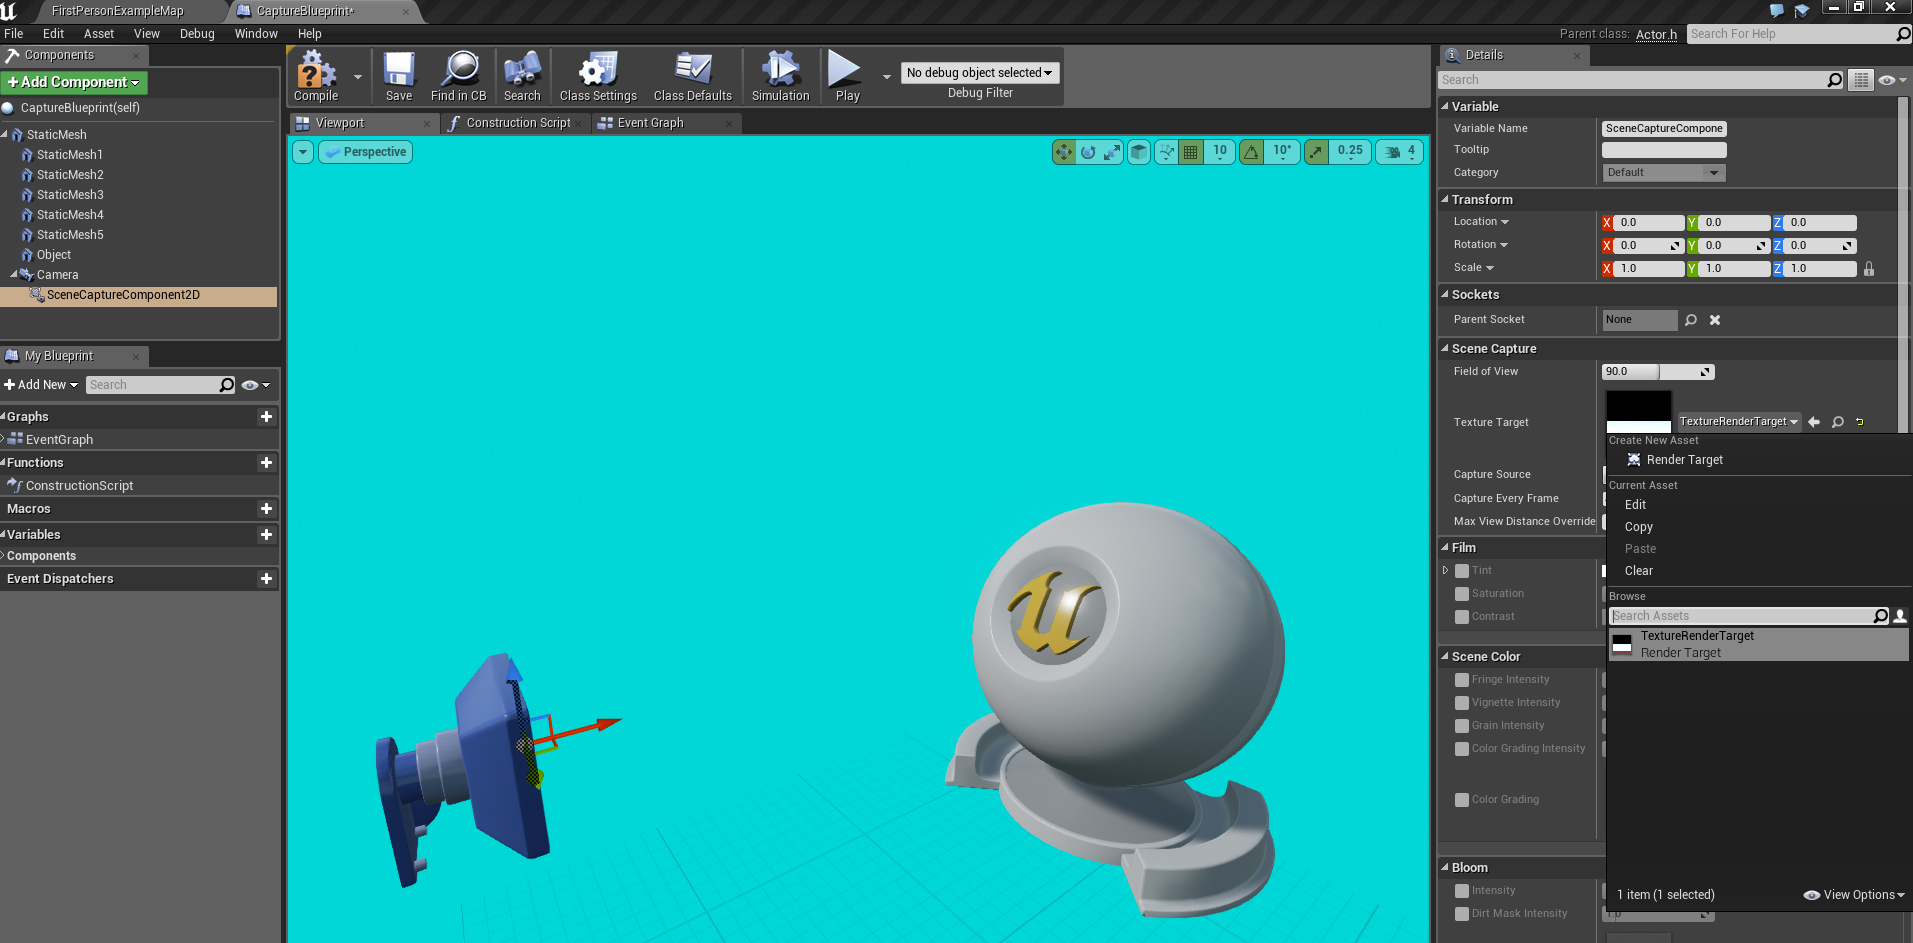
That’s it, what the camera captures will be saved to your 2D texture!
3 – Create a material from the texture
Here we are going to ‘transform’ our captured 2D texture by removing its blue background (or the color you chose for your studio walls) and ‘convert’ it to a material that we will eventually be able to use in UMG.
First, create a new Material. I named it ‘CapturedMaterial’. Save and edit it. Set its Blend Mode to ‘Translucent’, because we will need some transparency (the Unreal Engine wiki is really insightful about the blend modes if you want to know more about them). Then set its Shading Mode to ‘Unlit’, to be sure that it won’t be altered by any dynamic light once in our HUD. 
Once this is done, be sure to check ‘Used with UI’ in the ‘Usage’ panel of the settings, as if you don’t you simply won’t be able to select this Material in a UMG widget. 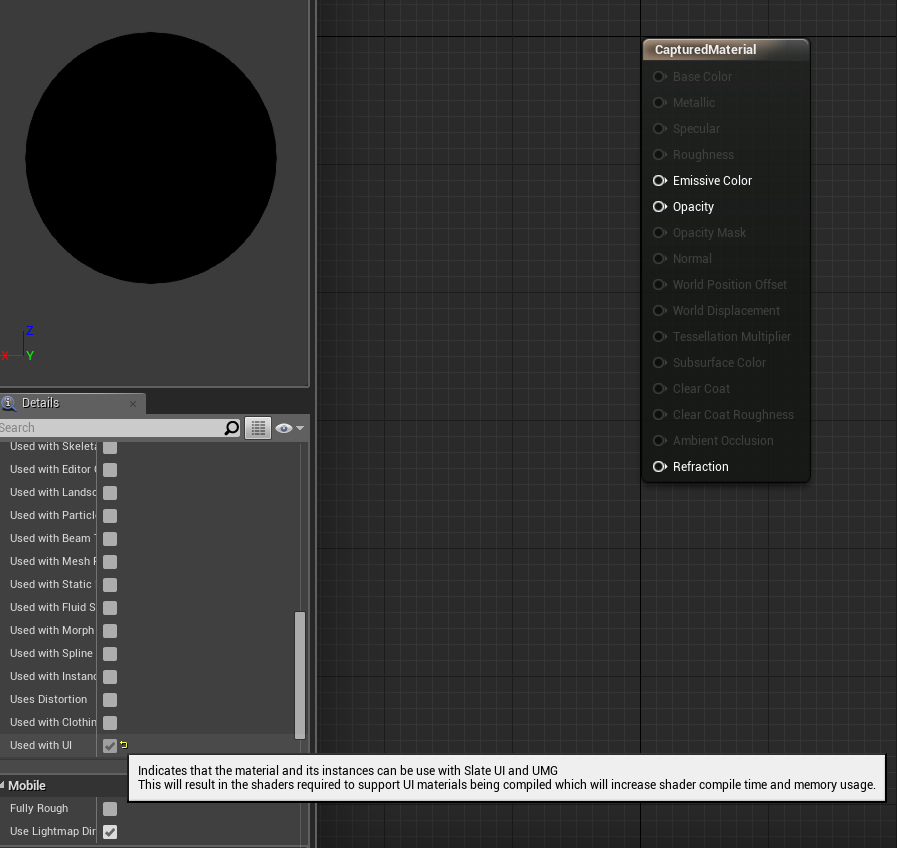
Now we’re good to go! Add a Texture Sample to the Material, and set your ‘TextureRenderTarget’ as its Texture in the settings panel. 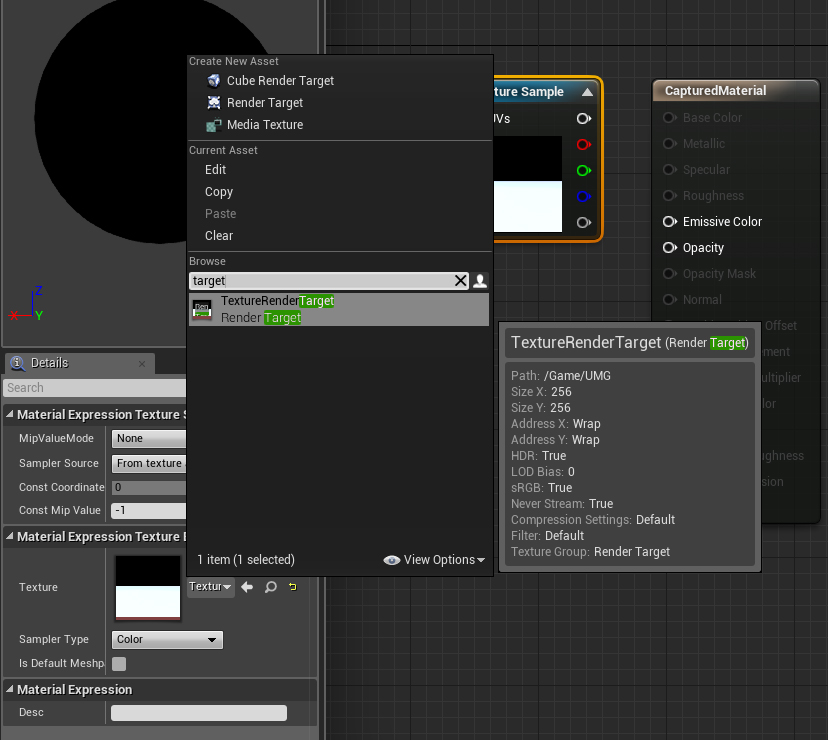
Link it to the Material ‘Emissive Color’ pin. 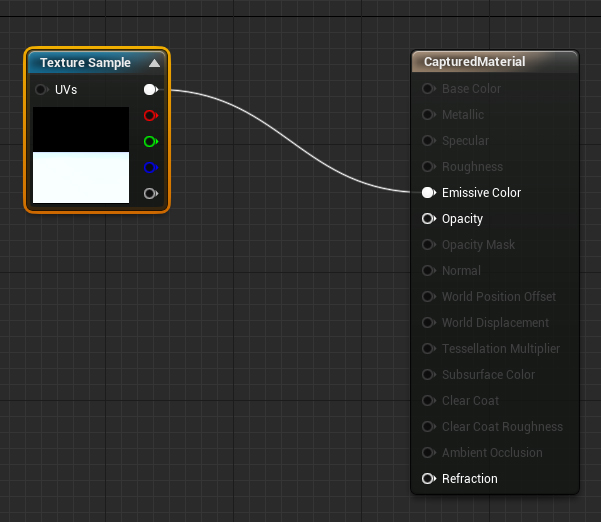
Now comes the part where we are going to make our studio background color transparent, so that only our model will be visible in our HUD.
Add a Constant3Vector component from the Palette and change its color to the color you used as the walls color – remember that I used the color RGBA(0, 1, 1). 
Then add the necessary elements to make your material look like this (the ‘0’ and the ‘1’ are simple Constant elements): 
Don’t forget to set the B constant of the If component. Adjust it if you later notice that the borders of your object are blue-ish when rendered (the higher its value is, the more blue will be transparent, but it could be that some unexpected parts of your object disappear if the value is too high). 
This is simply the part handling the transparency of the background color. I think what it does is straightforward enough.
Save. That’s it! Our Material is done!
4 – Use the material in a UMG widget
Now that we have a Material we can use in UMG, let’s… yeah, let’s use it!
Edit the UMG widget in which you want the 3D object to appear, and add an Image component where you want the object to appear. I will simply add it to the basic Canvas Panel, as you can see. 
Size it the way you desire. I am simply gonna go with 256×256. 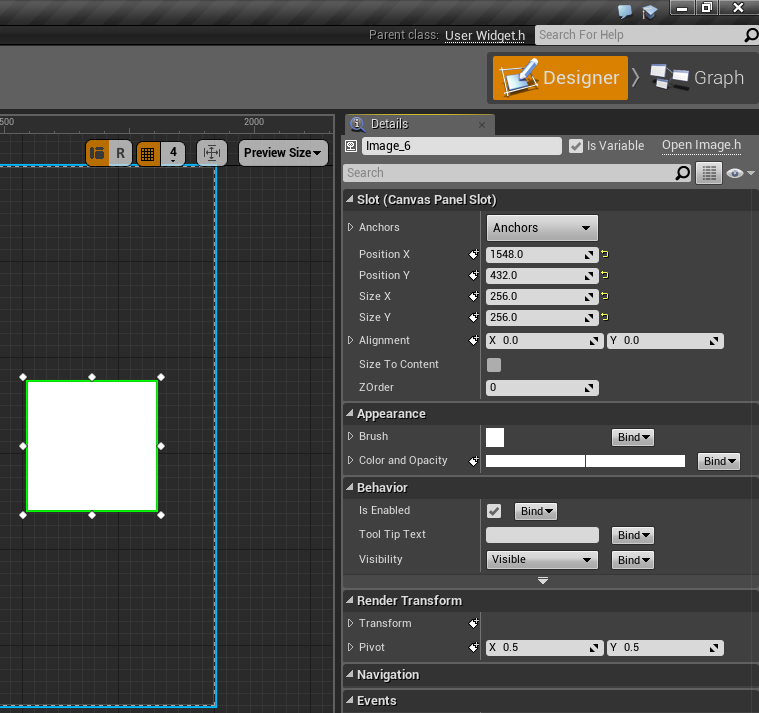
Then, in the Appearance panel, under Brush, set our ‘CapturedMaterial’ as the Image. 
Compile and save.
Last step, we need to add our CaptureBlueprint to our map, because it will not capture anything if it is not physically present in the world. Place it so that the player will not be aware of its existence (basically outside or under the map). 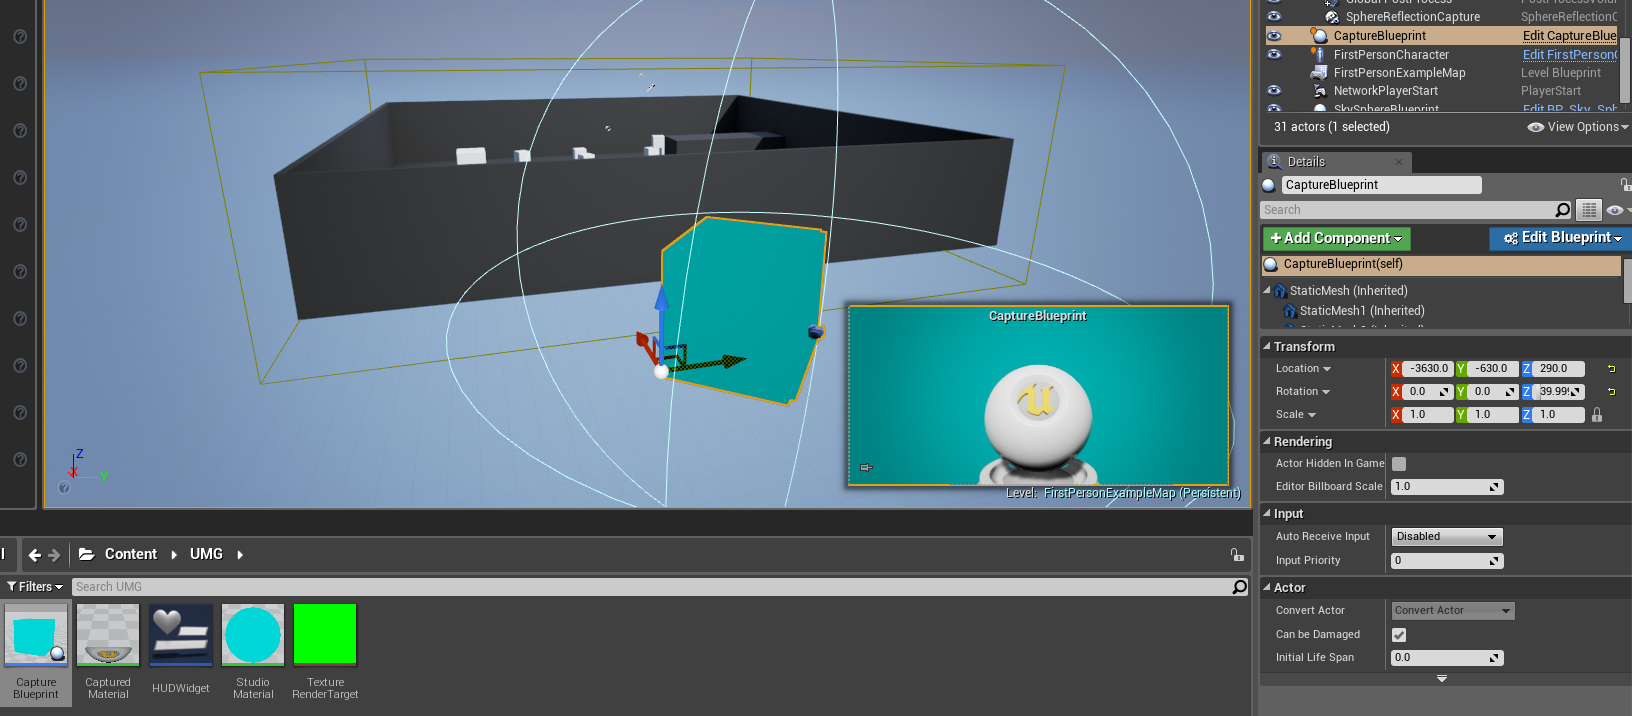 Notice that when you select a Blueprint that has a camera in it, a small window opens and shows what the camera sees.
Save, hit play, and enjoy: Your object is actually rendered on the HUD! Notice that the borders of my object are a bit blue-ish because of the reflections of the studio walls. If that happens to you too, you can fix it by adding lights to the studio in the CaptureBlueprint, and/or by augmenting your object material roughness.

Finally…That’s it, we have rendered a 3D Object in UMG! For now it does nothing in particular exept just standing there, but hey, it is a Blueprint after all, you can all the behaviors and functionnalities you can imagine to it. I don’t know, why not a 3D health gauge, with some particle effects like steam when it goes in the red for instance? Or whatever you need!
The whole project is available on GitHub if you need it. Feel free to clone/fork/download it!
Conclusion
I must admit that this looks more like a workaround than a real nice and perfect solution, and I realize that it needs a lot of some tweeking to look decent. But it will do the trick until Epic Games makes this a native feature of its great UMG… I hope…. And if I say please?!…
Don’t hesitate if any part of this seems unclear, or if you have any question/wittycomment/suggestion, or whatever.
See ya!
'게임엔진(GameEngine) > Unreal4' 카테고리의 다른 글
| World Location 과 Relative Location 의 차이 (0) | 2016.11.24 |
|---|---|
| A 메쉬애니를 B메쉬에 동일한 애니메이션을 적용 시키고자 할 때 SetMasterPoseComponent (0) | 2016.11.23 |
| Vulkan 이 언리얼4에 들어가게됩니다, 언리얼 4.14 preview 에 포함 되는데.. (0) | 2016.10.27 |
| 마티네에 이벤트를 추가한 후 블루프린트에 넣는 과정 (0) | 2016.09.30 |
| How do i call a custom event funtion? (0) | 2016.08.24 |