
최적화 방법 :
1. command 를 한번에 실항할때 10만개가 실행된다면 100개를 놓고 execute 하고 다음 100개를 놓고 execute 하는식으로 command를 균등하게 잘라서 실행을 분할해서 하면 좀 더 나아진다 : cpu 에서 이 10만개 command 를 준비한다고 걸릴때 gpu 가 노는 시간을 좀 완화 할수 있
2. commnad list 작성하는것은 싱글스레드 처럼 하는게 아닌 멀티스레드로 동시에 작성하여 줄인다.
command 여러개를 4개의 스레드(여기선 4개라고 가정)로 분산하여서 나누어서 gpu 에서 4개로 동시에 command 리스트들을 처리할수 있다.
100 개의 comnad 를 4개로 분산하면 25개가 될것이고 각 스레드당 25개의 comnad 를 처리하여 멀티스레드로 분산 처리할수 있다
이렇게 멀티스레드로 분산 처리하면 command list 작성하는 시간 자체를 싱글스레드 보다 멀티스레드에서 분산하여 줄일수 있기 때문에 프레임이 두배 이상 빨리지는 효과가 있다

main 스레드에서 comnad를 다 스레드에 보내고 모든 스레드를 main 에서 대기하는 방식 말고
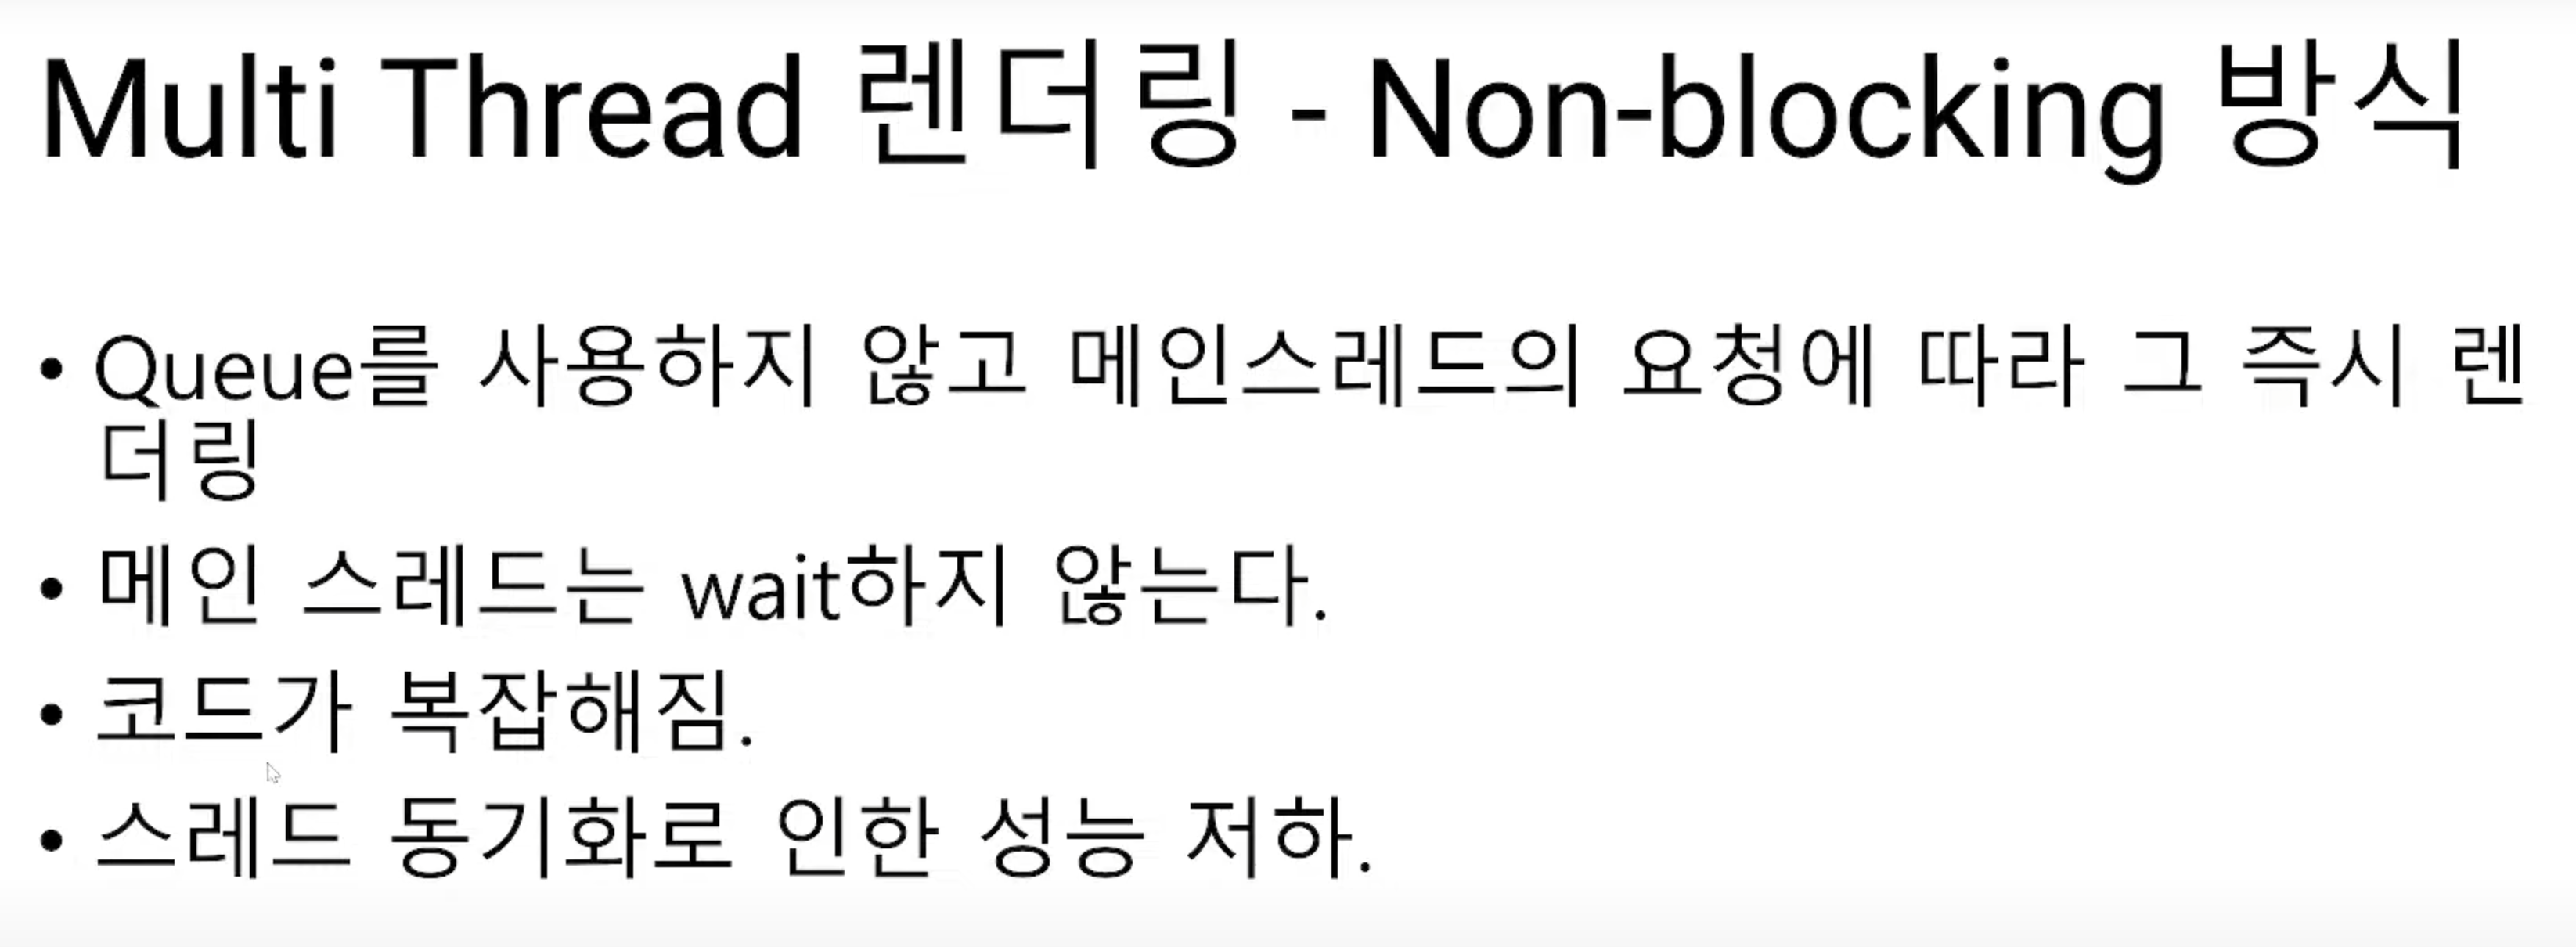
None blocking 큐 방식은 아래와 같다
실체 처리 전체 전계도 ( 아래는 None Blocking 큐 방식) : 기다리는 대기 없이 바로 전달하고 , 바로 꺼내쓰는 방식

후문 : 성능은 main 에서 멀티스레드 대기하는거나 none blocking 방식이나 비슷했는데 이유는 중간 중간 락을 해야 하는 일이 발생함, 드렌 워크 스레드에서 작업을 큐에서 가져오거나 push 할때 특정 순간에 락을 걸어야 해서 성능적으로는 비슷했다고 함 main 에서 대기 하는거나 락 프리 큐나
> 음.. 그래도 none blocking 가 기분적으로는 뭔가 더 빠른 느낌..ㅋㅋ
(사실 추가로 적자면.. 락프리 큐를 사용한다고 대부분 엄청 빨라지는 케이스는 그리 많지 않고 오히려 적다고 할 수 있다, 그래서 락프리에 대해서 회의적인 사람들도 적지 않다는 점을 참고할 필요가 있다 = 기분적으로 빠른것 같다는 건 이런 느낌을 포함한다)
스레드 분산할때 개수는 물리적 스래드 개수를 넘지 않는것이 좋
wait 줄이기
- 그리고 이전게 다 그려졌다고 확신(가정)이되는 지점에 기존 메모리에 새로 그릴겊 덮어 쓰는 방식으로 처리한다
주의 : gpu 로 전달하고 바로 메모리를 바꾸면 안된다 그럼 크래쉬 나고 다 그려졌다는 상황이 된다면
즉 command queue 에서 execute 를 한다음 이 작업이 끝났다는 것을 보증할수 있는 단계에서 변경해야한다
: 보통 fence 치고 여기 까지 도달했냐를 검사를 한다, 만약 앞의 작업이 다 끝났으면 그 리소스를 해제하거나 변경을 한다, 하지만 이런 fence 가 많다면 성능이 느려질수 있다 - 비동기 렌더링 방식 : CPU 타임과 GPU 타임을 아에 일치시키지 않는다,
현재 프레임 -1 , 또는 현재 프레임 -2 의 fence 값을 wait 한다. (현재 GPU 에서 처리 되는것이 완료 되면 그때 완료 되고 난 다음 프레임에서 cpu 에서 완료된 리소스를 지운다, gpu 에서 처리 되고 있는 메모리를 바로 지우면 크래쉬가 발생한다)

기다릴때의 타이밍은 CPU 타임라인에서 Present 한다음 GPU 에서 Draw 가 끝날때까지 CPU 에서 wait 를 하면 가장 안전하다
그런데 PResent & wait 한다음 다음 render 커멘드 만들때까지 GPU 는 wait 하면서 놀게 된다
그런데 여기서 N 번째 CPU 에서 처리한걸 GPU 에서 N번째 프레임을 wait 하는게아닌
CPU 와 GPU 프레임을 하나씩 늦춰서 , CPU 에서는 N-1 번째를 wiat 하게 되면 , CPU 에서 N-1 번째 wait 를 한다 할지라도 gpu 에서 처리가 대부분 N-1 이 끝나 있는게 대부분이어서 이런식으로 동기화를 처리하여 wait 타임을 줄인다

이 보디기식 중첩 렌더링을 성능의 30% 정도의 효과가 있다
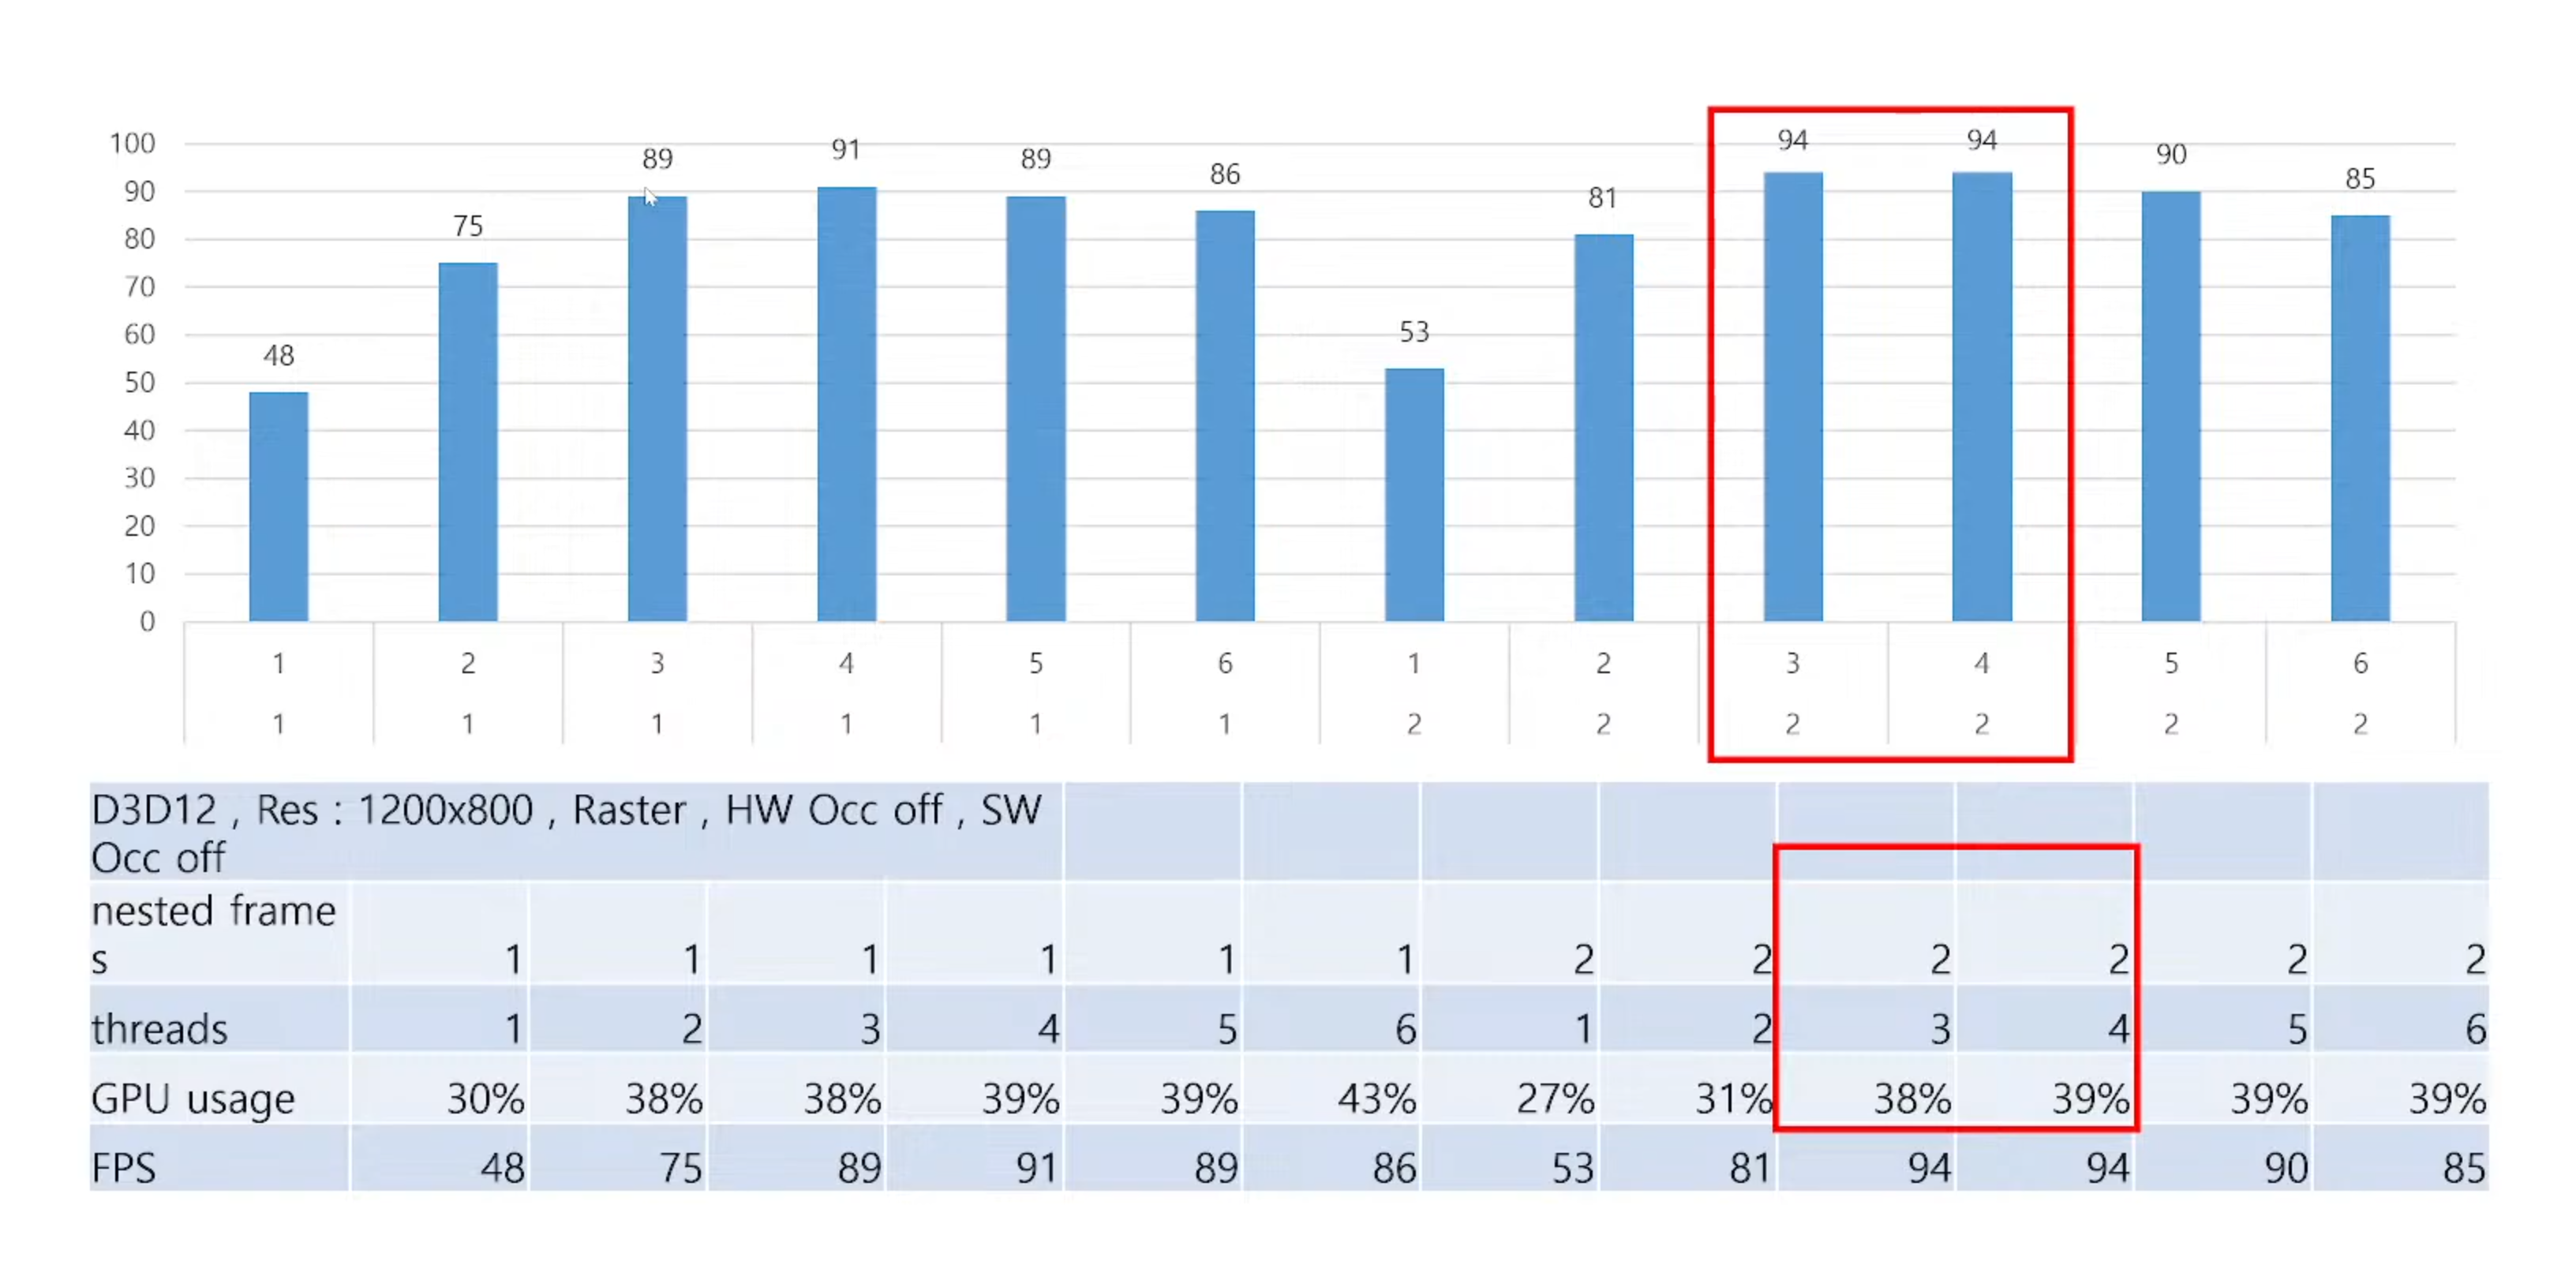
측정 결과 nested frames 가 중첩렌더링 수치인데 1은 중처 렌더링 안하느ㅏㄴ거고
threads 카운트가 3,4 ㅏ지 올라가고 nested frames 즉 중첩렌더링 수치가 2가 되는 지점에서 FPS 가 94 까지 가는것을 알수있다
그래서 중첩렌더링이 효과가 있다 , 그런데 thread 카운트가 5개가 되면 더 올라가진 않고 감소되는걸 알수 있다
이 thread 개수는 PC 상황에 따라 다를 수 있다
이 결과는 오브젝트를 많이 안띄워 놓았을때의 결과고 더 많은 오브젝트를 띄우면 더 효과가 좋
메모리 align ment가 64kb 로 큰데 이건 필요한 정점들 같은걸 3개 정도 분리 되어 있는걸 한번에 넣는 방식 등으로 최적화를 하면 도움이 된다
ref : megayuchi 님 글을 참고하여 작성함
'그래픽스(Graphics) > DirectX9~12' 카테고리의 다른 글
| [DX12] 디스크립터 힙(물리메모리)과 디스크립터 테이블(논리 데이터 묶음=집합) (0) | 2025.05.26 |
|---|---|
| ComPtr, IID_PPV_ARGS 용어 정리 (0) | 2023.08.18 |
| Instancing (0) | 2023.02.05 |
| 파티클과 지오메트리 셰이더 & 인스턴싱 (0) | 2023.01.29 |
| Dx12 기본지식 - 자원 상태 전이 (0) | 2022.11.16 |